PC Tips

If anyone is interested in meeting up for training in computer, digital camera,
or any electronics related area, do not hesitate to contact
Lisa G. at 732-237-9704
or any electronics related area, do not hesitate to contact
Lisa G. at 732-237-9704
Safely Remove Hardware |

|
When connecting a storage device or removable drive (aka Flash Drive, Jump Drive, USB Drive, External Hard Drive) to your computer, once you are finished using it (saving data or other files) - you must use the "Safely Remove" option or you will risk losing or possibly corrupting the information you stored on the device.
Most of the time, if you just unplug it from the computer you will be safe as long as the information you saved has finished saving. Some flash drives or external hard drives have a light on them - which shows it is in use. When the light finishes flashing most likely it is safe to unplug or remove the device.
But, to be real safe, if you see the "Safely Remove Hardware" icon in the notification area (at the far right of the tasbar - bottom right corner, just left of the date and time), you can use this to remove the device by clicking on the icon and clicking "Safely Remove" and then clicking accordingly in the next window - it will then give you a message that it is now safe to remove and you can remove your external device.
Printing and Print Preview
When printing from a webpage or website, it will be a bit different from a different browser. For example, the default browser on a personal computer is Internet Explorer (IE or the little blue "e") and is part of the Microsoft Windows Operating Systems. When viewing a website or web page in IE, you can click on "File", "Print Preview" and then you will see a preview of what you may wish to print, but you may see more pages then is needed. So, you would look at the preview and review the pages and then once you click on "Print" you will be able to choose which pages to print if you do not wish to print all of the pages.
In Mozilla Firefox (a third party web-browser and one of the most reliable and popular browsers), you will click on "File", "Print Preview" and print (pretty much the same as IE, but things may print differently.
In Google Chrome (also a third party web-browser), you will just right click within the area of the web page and you will click on "Print" and you will automatically get a preview and you will be able to choose the pages, etc...
Note that in various different areas of the websites we view, for example, Banks, Recipe pages, instructional pages, etc... you may see a print icon (a little picture of a printer) or it may even have the word Print, usually this will give you the best quality for your printed document (because the website is providing you with the shortcut to the best option for printing your document). But, keep in mind - not always. So, you will have to experiment sometimes.
Try it, visit various different websites/web pages and use the different browsers and initiate a print (you do not have to actually print anything, you can just go through the steps to practice).
You may also be printing from other programs, for example, Microsoft Word or Excel or maybe Adobe Photoshop or a Photo Editor or the millions of other applications/programs and remember, they will each have their various different ways to print. But, I do believe that most allow you to preview your print first.
User Accounts
The importance of the User Accounts you set up on your computer:
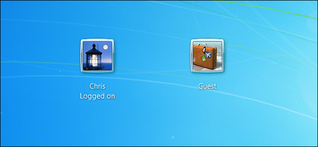
There are 3 types of user accounts that can be set up on a Windows computer:
Administrator, Standard and Guest.
The "Administrator" account is the one you set up with a password and allows you full control of Windows. You are able to install programs, change settings and do anything else you would like with Windows. Therefore, be very careful.
The "Standard" account has less ability to access everything like an Administrator, which will ultimately keep you safer. A virus is unable to install without the permission of the Administrator password. So, you would have to think twice, when something is trying to install and then requires a password. Whereas, if you were signed in as the Administrator, whatever wants to install - will just install and possibly be a virus. This is actually the best account for everyone. When needed and monitored by a computer savvy person, you may have to utilize the Administrator password to complete an install or download that you are super confident is safe within the Standard account.
The "Guest" account is a very secure account that you make for guests (plain and simple). This way the person (friend, relative, whatever) who is going to "just check his/her email" will truly only be able to do just that, no downloading, no viruses, no installing - just plain and simple safe web surfing.
Wireless Mouse and/or Keyboard

|
Ever need another mouse and/or keyboard? You can easily turn your tablet or smartphone into either one to control your computer or laptop. Note, the computer will have to have a wireless adapter to do so. Since it is pretty common for laptops/notebooks to have an internal wireless adapter, this app will be of great assistance, should your wireless mouse go dead.
You install the app on your smart phone by going to your app store on your iphone or android phone and type remote mouse and install. Then on your computer you go to remotemouse.net and download the program on your computer. Now, you will be able to control a mouse from your smartphone for your computer. |
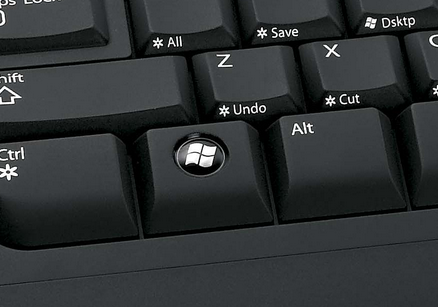
Windows Logo Key
|
The "Windows Logo" key on your keyboard is a very useful "control" key. It can be used in combination with other keys to produce a shortcut. For example, and my favorite, if you hold the windows logo key down and then press the "L" key, you will lock your computer or sign out so that you would just need to re-enter your password or another user can sign on. I find this useful when working on something, and have to leave my desk for a while. Enjoy! And Explore!
|
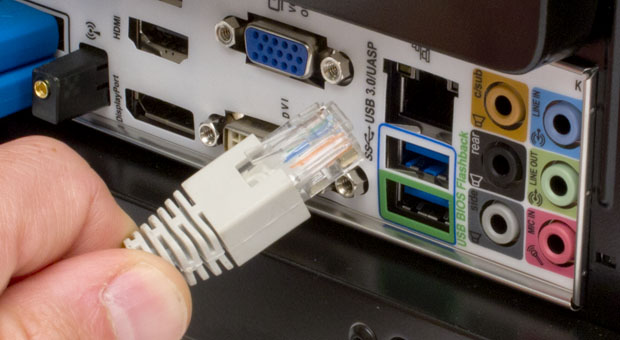
Disconnecting your Computer from the Internet...
Sometimes we are surfing the internet. Maybe you are Googling - looking up various ideas, products, services, places, etc.... and all of a sudden you click a link and your computer or the browser freezes. You think, what's wrong with this computer? Well, many times the website you are trying to visit is hacked, corrupt, down or just plain rogue or taken over by a virus or malware etc....
A really helpful tip is to just plain disconnect from the internet, restart your computer and then run your antivisrus software's full scan. Then review results and if ok, restart again, reconnect and launch your browser to see if
all is ok. If not, contact your favorite PC Tech! No use getting it in a worse state.
How to disconnect from internet:
If you are running a desktop computer or all in one (a tower or a monitor-all-in-one), most likely you are wired (directly connected with an ethernet cable or the wire that resembles a regular telephone wire, but is a bit bigger), then all you do is remove this wire from the back of the computer tower or all-in-one monitor. If you are connected wirelessly, then you will need to disable the wireless connection. There are many ways to disconnect wirelessly, so I am going to reference this link, Click Here It's a good interpretation.
Safe surfing and call me with any Q's!
User's Manuals or Guides
|
"Please read before doing anything else!"
Everyone is getting new gadgets, computers, and electronics and other than myself, I do not know anyone that reads the User's Guide or Owner's Manual. There are so many things to learn about your new electronic equipment and, for me, the instructions are just as much fun as the device itself. They tell me things I would not otherwise have known if I had not read them. These days, we are not always receiving the full instruction manual with the device or equipment. But, there is usually a Start Guide and this will help lots, in addition, it will direct you to a website where all of the pertinent information is available to you. Also, you will be able to register the product. This is very helpful for you and the manufacturer in case something goes wrong. That's it, I recommend you read your instruction manual or if you are like most people, don't! Call me, I will read them for you! |

Keep food and drink away from your laptop or other electronic equipment:
This is the time of year where food is a big part of the celebration of our Holidays and Festivities of the Season! But, food and drinks are a very big cause of havoc for your laptop and other electronics. I know, we all want to do every thing at once; eat, work, sleep, talk, watch tv, read, and what not, instantaneously, and utilize every second to fulfill our very big needs. Well, guess what? You really do not have to do anything you do not want to do and you can do it much more stress free and in a more enjoyable manner, if you try to relax and work when you need and eat when you need (separately).
Now, everyone who knows me well, knows I do not like to tell anyone what to do, but rather suggest how to do things or advise what is suggested by the manufacturer. After that, it is up to you to do it as you please. But, again, I say "but", I am the one reading the instruction books (because this is what I do and how I learn). Many people feel that most things can be figured out, without he need to review the safety points and instructions for the use of the product. It is not always figuring out how to use your new electronic, it is about learning things that no one would figure out. Otherwise, there truly would be no need for instructions or literature for people to read, because we would all have figured it out. I cannot tell you how many times I have heard this statement. Then, when something spills inside the laptop keyboard and or dust or crumbs get in between the keys, and the laptop starts acting strange, maybe shutting down, freezing, or maybe not even turning on at all, they wonder why and say they didn't do anything unusual. Well, whatever your excuse is, I will say that most of the time a well maintained and properly cared for computer or other electronic equipment will last longer than one which is treated without care by eating over it and having drinks nearby. Also, animal hair and any dust is a hazard, along with placing laptops on any other surface other than a sturdy table.
I can honestly ramble on about this endlessly, but I will stop at this.
Please take care of your laptop and electronics and I recommend that you eat when it is time to eat for you, and free yourself from any stress of work and go back to your laptop or work when you are done eating or drinking. If you need a snack, you probably also need to get up and walk away from the computer anyway, so do so!
I hope you enjoy your Holidays and eating as much as I do and at the very least, heed my warnings and keep your laptop free from food particles, liquids and dust. Or, if you need to get your laptop cleaned up - send it to me and I shall clean up what has remained on the surface and dust out the areas that are accessible. Remember, once those crumbs or drops get near the circuit boards (inside the laptop), you may as well kiss it good bye.

Facebook for Business:
Facebook, also known as an online social networking service, was founded in February 2004 by Mark Zuckerberg (along with others) and its headquarters are in Menlo Park, California. Facebook, Inc. held its initial public offering in February 2012. You can use FB for your business only or you can use FB for personal and business. For business only, you need to set up what is called a "Fan Page", where people and other business pages will visit your page and "Like" your page. This is preferable to people who don't want to provide a lot of personal information to get started. To create this page, you would click on "Create a Page for a celebrity, band or business."
https://www.facebook.com/login.php?next=https%3A%2F%2Fwww.facebook.com%2Fpages%2Fcreate%2F
You will then sign up and create an account for your business.
Now, you will need to link this to an email address (preferably a business email address, along with your website address - would be ideal). Now, it is all up to you to collect "Fans" or "Likes". And you will need to post often to hopefully keep your audience. I don't feel that more than once a day is needed, unless you have the time. But, at least once a day or a couple times a week - I would recommend that you post something relevant to your area of business.
You can also create a business page though your personal profile. Many people usually already have a personal profile. Facebook is all setup to be tied closely to your personal profile and your business page, so you will need to update the privacy settings on your personal page along with the setting on your business page, so that your visitors and/or viewers see only what you want to see. The settings tab in your personal profile is in the upper right corner (in the dark blue area) to the right of your name, home, friends, inbox, notifications, privacy shortcuts and then the small downward arrow (that you will click on and then click settings). Here you will see in the left hand column General, Security, Notifications, amongst others and your will click on each and then on the right side - set them accordingly. On a business page these settings are located in the white area below the blue area and starts to the left of the page at the top of your timeline photo. You will see Page, Activity, Insights and "Settings" - once you click on Settings, you will get a similar set of options as seen in the personal profile settings.
Additionally, you can link your page to Twitter - this will add links, posts, photos, notes, etc...which will allow your Twitter followers to also see your posts.
You will need to be logged into Facebook to view all of the "Help" areas within FB. They are very in depth, but nonetheless the information is there.
Have fun socializing and always stay positive and steer clear of any negative activity.

Passwords:
Your passwords for websites and various online accounts that we have these days have become a major topic as well as concern for everyone. Back when the internet first started (on August 6, 1991, the World Wide Web went live to the world), most of us were using a pet's name, or some numbers that represented something significant to you, to start an email account. As the years have gone by, we have heard one thing after another; change your password often, do not write your password down, do not give your password to anyone, change your password again, make a real strong password with many different characters, symbols and numbers, etc..., be sure to have a good password, and it goes on and everyone just says "who is going to figure out my password and why?" Well, it is not so much who or why, it just is that we live in this world with the world wide web and everything at our fingertips and if someone can hack a computer, a website, a database, etc... they will, if not only for the fun of it or just to prove that they can. And sometimes, it is not even an actual person, if you have been infected with malware (short for malicious software), every time you type a password in, it may be being recorded by the malware and this is what leads to hacked accounts and identity theft.
The best password is one that contains a random collection of letters (upper and lower case), numbers, and symbols. You will need to record your passwords somewhere so that when you cannot remember them, you have somewhere to look them up. Be creative: use a book and keep it in a safe. Use a secure website that is meant for this. Encrypted a file where you have the passwords stored. Use something with additional security.
All around safety requires diligence on your part (we are our own worst enemies and/or culprits). If something seems unsecure, stick to your gut and here is when assuming will not get you in trouble - assume that it is not secure and do what you must to make it secure.
Here are some guidelines:
- be sure you have Antivirus Software and that it is set to automatically update and also to run scans automatically.
- be sure your operating system is always up to date and set to run automatically.
- be sure to update your browsers.
- do not buy security software from scammers online or ones that call you on the telephone or contact you through email or sneak into your pc through another program.
- be very cautious with downloads (you should first save the downloaded file, then scan it with your antivirus software and then use it as needed, once you are sure it is safe. Also,be sure to uncheck the additional stuff or PUPs (potentially unwanted programs) that try to install during another download).
- create those strong passwords and use them to sign in and out of your accounts (if you let the computer remember them, then you will never learn them - if you have to sign in every day or every other day, you will eventually learn them and then soon, you will have to change them again).
- if you think your computer is infected with malware or viruses, the first thing to do is disconnect from the internet (literally "disconnect" if connected wirelessly or remove the ethernet cable from your pc) - run scans, hopefully clean and fix it. Or, if it is so bad - you may need to contact a computer technician to help fix your computer and be careful to know who you are contacting. Also, you will need to change your passwords on a different computer (one at work or at the library, one that you can be sure is safe and not infected) or the condition will just continue.
 Lisa G., A2Z Computer Help, Computer Repair Technician
PC Tune Up Tips:
A Tune Up of your Personal Computer (PC) is just as important as the oil change or tune up you have done on your automobile. Or, another analogy may be your yearly dental check up or cleaning (every 6 months). Our computers are a very important tool for many tasks these days, would you not want it to always be running properly?
Based on the tasks I perform for a tune up and some that I have researched, here are a few of them:
-Remove unwanted programs, software or applications. But, be sure that they are definitely not something your system needs by researching the publisher or program itself.
-Aside from needing antivirus software, any other program in your "Programs" that may say something about or claiming to speed up your PC or optimizer, cleaner, etc...may be the culprit for a pc that is running slow. There is no magic program out there. I would go with and recommend only what the manufacturer (Microsoft) may recommend at their support page. An exception to the above mentioned, would be CCleaner. I haven't used the program more than a few times myself, but, I have found reports that the "ccleaner utility" by piriform is an old tool that is free and useful.
-Disable startup programs. Click on the start button and type msconfig - this is where it really may be a good idea to have a "Tune Up" performed by a certified computer technician.
-Be sure your PC is up to date: Windows Update is up to date along with your manufacturers updates being checked. (Even though for the most part, these tasks are usually set automatically, there is some user interaction from time to time, so be sure to check).
-Run Disk Cleanup - (be sure to check all the boxes and click ok and it will ask if you are sure, etc... ok again and once it is done, it will disappear. Restarting your computer after it is finished is a good idea).
-The Action Center has a good troubleshooter. This is the little white flag that sits in your system tray (the place in the bottom right hand corner, just to the left of the clock on your desktop). I often advise people to watch this flag and be sure that it is not reporting anything other than "No current issues detected". If there are issues, just open the Action Center and follow what it says. Or, you can even go in and click on the Maintenance section and then click "check for solutions".
-Be sure to remove any malware (short for malicious software, it can be anything from software that disrupts our computer operation, gathers personal and sensitive information, gains access to our computer and includes viruses, worms, trojan horses and the terms go on and on). The point is, if you have software that you do not know where it came from and it was recently added unbeknownst to you - you should remove it. Again, this may be the job for your computer technician.
-Install more RAM (memory), if system allows.
-Install a bigger Hard Drive.
-Upgrade your Operating System, if your system allows.
-Defragment your hard drive. This is a tool that I use in conjunction with Disk Cleanup (but, I use it last - after all else has been done and your system has be rebooted or restarted - then I would run the Defrag and reboot again when all is completed). With windows 7 and windows 8, it is set by default to run weekly (on its own, but the computer must be on). I recommend you change it to monthly and have scheduled to be run at a time that your computer will be on and possibly not being used.
The single most important thing to do before giving away or selling your old or extra Computer:
The best way to destroy your data on a hard drive is to physically destroy the computer's hard drive. You can smash it a couple times with a hammer or drill holes in it and be sure to dispose of the parts properly.
Now, if you would like to reuse/refurbish, give away or sell the computer, you could put a new or used (clean) hard drive in the computer and install an operating system. Of course, you will need the reinstallation discs for the Operating System and/or any programs you want, to complete the reinstallation. So, be sure you have what you need before removing and installing a new hard drive. It is not as easy as it sounds, but with some patience, it can be done by anyone. Or, you can contact your local pc tech or geek, they love to do this stuff!
If you want to reuse the hard drive that is already in your old computer, you will need to remove your data and this does not mean delete a file and empty the recycle bin. This just hides the files until they are eventually and possibly written over by the Operating System. But, until then - anyone with the right tools, such as a program called Recuva from www.piriform.com - there is a free version and a paid version - this program will recover deleted files in a flash (as it says on their website). I did personally use this program for a friend who mistakenly deleted thousands (and I mean thousands over 30,000) of photos and we were able to recover them - but I left her with the task, once I got the program moving, because this was going to take hours if not days to sort through and reorganize the recovered files, etc... So, back to the hard drive, you can wipe your hard drive by using the Recovery feature included with your Operating System. Each Operating System is a bit different, but what you end up doing is reinstalling the Operating System and wiping the hard drive clean back to the state it was in when you first purchased the computer. This will remove all user accounts, all files (documents, photos, music, videos, programs, etc...) and very important - you will need to reinstall all Windows Updates that have since come out since the Operating System was first offered and then you need to install antivirus software and again update. I usually say this is a minimum of an 8 hour task - most of the time the computer is running on its own and you just need to watch for when you need to assist with clicks and restarts etc... And, of course, there are many other tasks to go along with this reinstall. This is usually the way I will clear up and or remove a very bad virus that is not clearing up by using the antivirus software along with other removal tools and tasks performed to try to clean the virus. It is the only way to remove the virus completely and to get the computer functioning properly. If a virus has corrupt the Windows Registry (this is what stores the configuration settings for the Operating System, that if corrupt will eventually render it useless - and ultimately need to be reinstalled). You can also delete user accounts, for example: you have 3 user accounts - Admin, Child, 2nd Child (or Home PC, Johnny and Sally) - hopefully whoever set up your computer made at least two accounts that are Administrators and one that is a standard user (because this is a great help, if you need to get out of a bind). Here is the scenario: if you are an Admin called Home PC and you have a 2nd Admin account called Admin and you only use the one called Home PC, then when you want to delete the files from the Home PC account, you would sign in as the unused account Admin and then go into user accounts and delete the Home PC account and all of its files. Now, this can be done even if your computer was set up with only one user account - you would just go in a create a new Admin account and delete the other. But, remember, if the computer has a virus you may not be able to sign in; but, with another Admin account that is basically unused, you may be able to sign into that other account and delete the account, where the problem is, to remove the virus also.
Now, if you went the route of deleting the user account and creating a new one or using the additional unused Admin account, you may still want to use a program called "Eraser" (you can get it here: http://eraser.heidi.ie/), which will wipe and delete the specific files or overwrite the selected areas on the hard drive to prevent anyone from recovering any deleted files.
Incoming telephone calls:
This seems to be an endless topic that I have written about in the past, several times. But, with recent situations, I am again finding it a useful topic that I hope you will take into consideration when picking up your telephone (land or cell) and how to deal with the person on the other end or whether or not to call a person back based on just the caller id information.
These are the top 3 situations in the news recently:
1-The newest scam is the "one ring" call and it works like this: Your cell phone rings once, you may miss the call, but you are curious because you do not recognize the number - so you call back. You are then connected to an international adult entertainment service or maybe a chat line where you will be charged for the calls. (I have seen fees reported at $19.95 for an international call and/or $9.00 per minute). This scam works through a computer that is set up to randomly dial out to thousands of numbers and if you are the one to take the bait - you lose!.
2-You receive a call from a person saying they are tech support or an IT tech with Microsoft or Google or any other recognizable tech support company. They tell you that they have detected a serious problem with your computer and they need to fix it. Ultimately, they want you to allow them into your computer - (PLEASE, DO NOT ALLOW ANYONE INTO YOUR COMPUTER - IF YOU ARE THAT SKEPTICAL AND WANT SOME CLARIFICATION - CALL YOUR COMPUTER MANUFACTURER YOURSELF AND BE SURE YOU DO GET THE REAL TELEPHONE NUMBER, IT WILL BE IN WITH THE WARRANTY DOCUMENTS WITH YOUR COMPUTER) - once they get into your computer, they can do anything - initiate a virus, steal your identity, wipe your hard drive - whatever is the worse that could happen is what will happen. (Apologies for the CAPS, I just want to be sure you do not do this).
I will repeat, no one will ever call you that is legitimate and trustworthy enough to allow access to your computer or any other device. Remember your manufacturer can be contacted if you wish to question any strange calls etc... A tip here would be to ask for the person's telephone number to call them back (you wouldn't believe what happens next), then check the number against the number on your caller id, although this is not always a sure sign - because people telework, etc... but, different area codes may be a clue.
3-Someone calls you from an office or business landline that they are borrowing or visiting at the moment and you disregard listening to the voice mail or you just aren't able to get to the voicemail at the time. Well, you will not always get the person at the number you see on your call id. I would like to recommend that you get the correct number, listen to the voice mail or look up the individual - if it is a friend - I am sure you have the person's proper telephone numbers to reach that person.
Whether you are receiving scam calls or calls from friends, family, business or whatever - I strongly recommend that you disregard the number you see on your caller id - because it will either get you in trouble or you will not be reaching the person who wishes for you to call back. It is all requires a bit of common sense, respect and basic courtesy (these are some things that seem to be slipping away based on the "always connected" world that we are now experiencing).
Be careful out there and enjoy your electronic devices!
Internet Explorer is Microsoft's browser:
You must launch a browser in order to visit websites/webpages. For example, if you click on the blue "e", you will launch Internet Explorer and if you use the search engine "Google" to search for professional women's organizations in Ocean County, NJ - you will find that www.bpwsoc.org comes up in the list of results for this search. Now, you would click on the website and you would be viewing this website in the Microsoft Internet Explorer browser.
You may or may not have heard in the last few weeks about the serious flaw can let hackers place a virus on your computer. Apparently, it is in all of the versions of Internet Explorer that have been out over the last 10 years. It also does not matter what Operating System you are using either. This is another reason that Windows XP can be extremely dangerous to continue to use. Even though Microsoft claimed to end all support to Windows XP on 4/8/14, they did put out an update last week, but this would be enough to keep me out of or off of the internet on a Windows XP machine. The fix for the Operating Systems after XP, (which are Vista, Windows 7 and Windows 8 (8.1)) still must practice very cautious web searching and be extra certain that your Operating System, additional software programs and applications and your antivirus software are all up to date. The bug is a drive by hack - you only have to visit the website that hackers have hijacked and/or modified and your pc will become infected with the virus.
Your best defense is to refrain from using Internet Explorer and choosing an alternate browser, which will instantly stop the threat according to research. Chrome is a free browser that is put out by Google. You can download it here:
https://www.google.com/chrome/browser/
To keep yourself safe, it is best to copy the link above from the "h" to the "/" and paste it into your browser's address bar. Of course, you will be using Internet Explorer to do this, if during the setup of your computer - the person setting up did not include additional browsers. Usually a good computer technician will include other browsers for you and explain the use etc... Another free and safe browser is called Mozilla Firefox and you can copy the following link to download the browser:
https://www.mozilla.org/en-US/firefox/new/?f=30&utm_expid=71153379-
28.SNKFJ4VqRziIW1TLqjhpAw.1&icn=tabz&utm_referrer=http%3A%2F%2Fwww.mozilla.org%2Fen-
US%2Fproducts%2F
Another thing that I would like to point out - is to take notice of the links that I am giving you, they both start with https (Hypertext Transfer Protocol Secure) - this means that it is secure. You will see addresses for your bank and for other e-commerce companies that are reputable and following proper security protocols to keep its users safe and secure during transactions.
Finally, remember that these browsers will be somewhat different from what you may be used to and accustomed. You will not see "favorites". These browsers refer to your favorite places as "Bookmarks". And, when you download a file or a program/application - the procedure will be different. As in anything you must become accustomed to the new and or different way that this browser does things for you.
For me, I would not dwell on the difference of it, I would rely on the fact that I will be able to browse the Internet in a more safe fashion.
|
|
Using PayPal
It's very easy and convenient to send money to a friend or family member - for free. PayPal allows you to send money to anyone, even if they do not have a PayPal account. The sender must have an account that is linked to a bank account. You can also have it linked to credit cards. But, if you use a credit card, then you will be charged a fee of 2.9% plus $0.30 per transaction and the sender can decide who pays the fee (therefore, if you discuss this with the person you are sending money to first, you may agree to charge the recipient the fee). I feel that if I am paying you with my credit card, I am the one who should pay the fee. Another example, if I am sending you money for something that you purchased for me (like concert tickets) or a loan to me (split the check at dinner), it is still my responsibility to pay the fee (if I choose to use a credit card). But, again, if I send the money to you direct from my bank account, it is totally free. And this is a great way to accomplish transactions without always having cash on you. On the other hand, if we are talking business - you can send me money for something that you are buying from me or I am selling to you (known as goods and services), and I, the merchant, (in my opinion) should pay the fee. This fee would basically be the same as if I went to a store and used my Visa card to purchase something - I pay the price as listed and the merchant has fees to pay to the credit card or bank issuing the resources to provide this service. The fees are 2.9% + $.030 per transaction or if you have a PayPal card reader (this is the swipe device that you can plug into your smart phone), then the fee is 2.7% or, be careful - if you manually enter the credit card # it becomes 3.5% plus $0.15 for the manually entered transaction. Again, any fees can be discussed and agreed upon through the parties making the transaction. |
What can you do with your Old Windows XP Computer?
I have been speaking about the "end of support" for Windows XP a lot lately and I feel it is an ongoing subject at this time with the end date of April 8, 2014.
So, on April 9th, this "end of support" does not mean that your computer with Windows XP will suddenly be hacked or filled with viruses. But, it should be understood that the most secure computer system is the one that is not connected to the Internet (by saying "not connected" - this means that if you have a desktop pc or a laptop/notebook pc and your are connected directly with a wire, (known as an ethernet cable (RJ45) - this is the cable that looks just like the old telephone cable (RJ11), but is a bit bigger); then you must disconnect this cable - either from the back of your desktop pc or the back or side of your laptop (or you can follow the cable and disconnect it from the other end, which is where you are receiving your service into your home - the cable modem). Now, if you are connected wirelessly, all you have to do is turn off the switch on your laptop computer for wireless connectivity (if it has one), or usually it is one of the "F" keys at the top of your keyboard that turns the adaptor on and off. Or, you may have an icon down in the right hand corner of your computer screen that tells you, you are connected to your wifi and you can click on it and then click disconnect. This will render you disconnected from the internet.
Now, you can use that old pc for many different uses without connecting to the internet. Here are some ideas:
You may have a "Word" program that you can still type letters on etc... and print them or save them and even transfer them to another computer (with an external drive or flash drive). You can call it your word processor or typewriter.
You can play all of your music from it and even add more (if you have the hard drive space), by loading your cd's to your music library.
You can still view your photos and or add more and edit and create with them accordingly.
You can play the games like Solitare, Minesweeper, etc...
With a little creativity, you can come up with many DIY projects that would not require an internet connection. Another would be you can use it as a storage for all of your recipes (you can type them, scan them in, or you may have already downloaded and or copied and saved many and you have them in folders that you can always go back to view).
If you are a big risk taker, you can still surf the internet, but I would not recommend doing anything that could jeopardize your identity (like banking and purchasing).
Some systems will still allow for the upgrade to Windows 7 (but, Windows XP - only allowed for 3GB of memory), and it is likely that your pc will not allow for more RAM - so it will not be the fastest pc, but again, it will function.
Finally, (but still not the only conclusion), you can try a Linux Operating System (Ubuntu). Linux is an open source operating system (this means that it is developed collaboratively and no one company is responsible for its development or ongoing support). Ubuntu is a Linux operating system, which is available for free with community and professional support. You can read all about this free operating system at www.linux.com and/or www.ubuntu.com.
And, of course, you can have a computer technician install and set up this operating system on your old pc to get more use out of that old computer.
Things you should know and do for a New PC:
When you purchase a brand new PC there is much more to the initial set up then just plugging it in, turning it on, and filling out a few forms and then surfing away.
I recommend the following:
The number one most important thing is to create the Recovery Media and/or a full image of your hard drive - once you have it the way you want it. (Some manufacturers, ie...HP, Dell, will allow you to create Recovery Media just once - and the time to do this is when the computer is right out of the box). The others that do not offer this option, then you have no other choice but to create a full image of the hard drive.
Next you will need to be sure you install any additional programs that you need, ie... Microsoft Office, Photoshop and of course, your Antivirus Software. Additionally, you will need to remove what some may refer to as bloatware. These are programs that are preinstalled on your new PC and they offer you a trial period and after that period you would need to pay for the program. If you are not going to buy the particular program then you need to remove it, because it is only taking up space on your hard drive and it will constantly be telling you that the trial period is up. This is very important with your Antivirus Software, because you can only have one Antivirus Software program installed on your computer for it to run properly. But, you can have another program called MalwareBytes Anti-Malware which is a free utility that can run in addition to your Antivirus Software. It can be used as a backup to check for malware that may have been missed by the Antivirus Software. But, remember; only one Antivirus Program should be installed and any trials or additional ones should be removed or uninstalled.
You want to keep all of your programs (a.k.a. software, applications) up to date, this is absolutely essential for your computer's well being. While most programs will automatically update, there is still some user interaction required. At this time, with a brand new PC, you will be checking for Windows Updates and that all important and critical updates are downloaded and also check into the optional ones, which are usually important as well. The Antivirus Software that you choose will need to be updated immediately after download. Additionally, your computer manufacturer may have updates available within a program that is set up for you to run and check for these updates.
You will need to check your browser, ie... Internet Explorer that it is up to date and you may also want to download some additional browsers for you use, for example... Chrome (from Google) and Firefox (from Mozilla) or Safari (from Apple - it is compatible on a PC). Along with browsers come Adobe flash and shockwave and Java - these are multimedia platforms that are used to help with the view, play games, chat, etc... on webpages.
Finally, once you are all set up the way you need your computer for your tasks and or entertainment and you have your recovery media and/or system/factory image, antivirus software and a backup plan for all of the files you are going to create, you can go and have fun and start exploring.
Most of all, have fun, enjoy your computer and if you find all of the above too daunting - just call your computer tech to set your pc up for you!
The End of Support for Windows XP:
Microsoft will stop supporting Windows XP on April 8, 2014.
What does "end of support" mean with regard to the fact that Microsoft will stop supporting Windows XP on April 8, 2014?
A bit of history first:
Your desktop computer or laptop/notebook computers require an operating system in order to perform the basic functions of the computer. It is a collection of software that manages the computer's hardware and allows other programs to run. It is comprised of many files that your computer needs in order to boot up (or startup). Without an operating system, your computer would not function and/or boot up.
Windows XP was first released to computer manufacturers on August 24, 2001 and has been one of the best running operating systems compared to it's predecessors. But, Microsoft, (along with other software companies), wish to move forward and continue to progress by making and/or creating better software to run our computers and fortunately or unfortunately, we must follow suit.
"End of Support" means the end of updates along with security updates. Therefore, if and when an expoit (an exploit is a program or technique that takes advantage of a vulnerabvility in a web browser, software application or operating system which can attack your computer) is found after the end date, it will not get patched (meaning there will be no more updates to fix the exploit). Gradually, Windows XP will basically become less secure and continue to become less secure.
You have 2 options, you can buy a new computer that will come with Windows 8 and, by far, be much better than your computer running Windows XP or you can see if your present computer's hardware will allow for an upgrade of the operating system (but it is not likely - due to the fact that the resources required for Windows XP were so much less than the requirements of Windows 8). But, it never hurts to check with you PC Technician to see what may be best option for you.
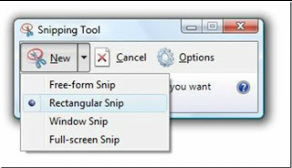
|
Microsoft Windows Snipping Tool:
The Microsoft Windows Snipping Tool is an application that has been included with your Operating System, since Windows Vista forward (Windows 7 and Windows 8). It is used to capture screen shots a.k.a. "snips" of an open window. This is a great tool that can be used for so much more than just a screenshot (which you may have previously known how to do by pressing the "Print Screen" key on your keyboard). With the Snipping Tool, you can crop out or "snip" any area of the page you are viewing on your screen. In addition, you can save your "snip" in several formats (.jpg, .png, .gif, .mht). You can also write on it, erase and then email the file). Again, it is a very useful tool that if you use a little imagination and creativity, you will find many uses for the snipping tool. One that I use very often is to "snip" a picture to use within a document, website, article, post, etc... |

Email and Texting Etiquette:
There seems to be a constant decline in our etiquette. I feel this is due to the digital age with all the gadgets and constant contact we have we each other, that we are forgetting that you still need to respond accordingly and or show some respect for privacy.
Here are some of the top areas that I feel we should take notice:
The list goes on, but this is just a somewhat short reminder. And remember, some of this is mentioned in a great book that I love and endorse "Dude, Seriously, It's NOT All About You!" by Susan P. Ascher
There seems to be a constant decline in our etiquette. I feel this is due to the digital age with all the gadgets and constant contact we have we each other, that we are forgetting that you still need to respond accordingly and or show some respect for privacy.
Here are some of the top areas that I feel we should take notice:
- Be informal, but not sloppy; keep messages brief and to the point (the point can also be what is in your
- Use small letters or capitalize the first letter of a sentence; when you use all Caps, it looks like you are
- Use a blind copy (bcc) and courtesy copy (cc) appropriately. BCC is good to use when you have a
- Do not use email or texting as a way to avoid personal contact and don't forget the value of face to face or
- Do not get wrapped up in sending chain letters, virus warnings or junk mail.
- Remember that your tone can be heard in an email or text and/or possibly misconstrued.
- Be sure you are emailing and/or texting the right person.
- Respond. (whether it is just to confirm, thank or reply, but just respond period).
- Be aware of what you should use email or texting for (not for sad news, business matters or urgent meetings
- Another area that has become meshed into email/texting is photos; be cognizant of the photos that
The list goes on, but this is just a somewhat short reminder. And remember, some of this is mentioned in a great book that I love and endorse "Dude, Seriously, It's NOT All About You!" by Susan P. Ascher
What is the Cloud?
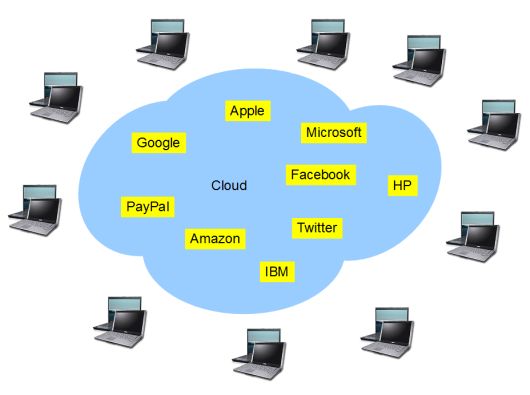
"The Cloud" is storage space on the internet. Cloud resources are shared by multiple users. This means that everyone can be subscribing to the same cloud service, but you all have your own sign in and password. If you need further security beyond the password, you must use encryption.
Cloud Storage Service: This is where you share and keep files off of your gadgets, ie...smartphone, tablet or computer. There is a possibility that the service can go down and your files may be gone. This is not an automatic service, you have to tell them what files to upload or you can just access the file in the cloud and work on it there.
Recommended Cloud Storage services are Dropbox, Skydrive, Box, iCloud, Google Drive and many more.
Cloud Backup: This creates copies of your files and if one copy is lost or damaged, your files are still safe. Cloud Backup is automatic and it detects changes and backs up the newest version immediately.
The most popular and highly recommended Cloud Backup service is Carbonite.
To Shutdown your PC or not to Shutdown your PC
This question is asked often and the real answer is that it doesn't really matter. But, there are always two sides or answers to every question.
Here are some facts about the issue:
Way back, years ago, it was a bad idea to shut down your pc too often, due to hard drives and the various parts that didn't shut down smoothly and could actually damage themselves if they weren't turned off properly or too often. By shutting down or off properly, I am referring to shutting down from your computer's on-screen menu (ie...Start, Shutdown or Restart and Shutdown or just Restart (aka rebooting). Shutdown, turns your pc off and Restart powers it down, but comes back up to a startup - this is sometimes used when installing updates or just to refresh your system.
Modern hard drives will not experience the same wear and tear as they did in the past. While they will die eventually, shutting down will not harm them and/or allow them to die faster. Again, as long as you are shutting down properly. (If you unplug your computer randomly or hold the power button on your computer in the middle of your work, this will eventually cause damage to the hard drive and or other parts, possibly sooner than expected).
Many times when you shut down, Windows will install new updates that make your computer faster and safer. Also, regular shutdowns can help you save energy. (This is only true, if you are using a proper "Surge Protector" and you shut down the computer and then power off the "Surge Protector" also. Computers and TVs will continue to suck power just by being plugged in. But if you turn off the "Surge Protector" (after you shut down), then your pc will behave as if it's been unplugged.
Turning off your computer also means you won't hear random noises or see lights during the night and this can be
disturbing to some folks.
Leaving your computer on however, means that it can get most updates (sometimes there is user interaction required), you don't have to wait for the pc to boot up and it can perform some routine maintenance like defrag, run antivirus scans and these processes won't be hogging up resources while you are working, because they would be
occurring during the night or whatever time it is that you are not usually using your pc. That is, of course, that you have the times set for these scans and maintenance schedules.
So, I would definitely shut down if I were going away or will not be on my pc for a few days or so. Otherwise, I leave it on most of the time and reboot it at night when I am done for the day, this way when I sit at it the next time - it is refreshed.
Which email service is better? The email service from your ISP (Internet Service Provider), ie...Comcast, Verizon, Optimum etc... or email from a web based email provider ie...Gmail, Yahoo, Hotmail, etc...
The reason your ISP sets you up with an email address is to have something besides your telephone number and address to connect with your online account, such as viewing your bill, paying it, making changes, and as a convenience. But, you are not locked into having to use this email address and you may benefit from using a web based service like Gmail, Yahoo or Hotmail. By using your ISP mail, you are missing out on cool features that web mail has to offer, ie...accessing it anywhere no matter who your ISP is, it works much better with the apps on your smartphone and tablets and you won't find the advanced filtering features, spam blocking, inbox space and other features that are not available through your ISP's email service.
It may be somewhat of a task to switch and you may think, "How am I going to notify everyone", but really it isn't that difficult. Web based email like Gmail have so many features. They will allow you to forward your emails that are being sent to your ISP address to your new address and vice versa. You would go into your ISP account and go to the forwarding option and have all mail go to the new web based email account. And little by little, your friends and services will be emailing you at the new address. You can formally advice everyone to use the new address also and to delete the other. And whenever you sign into an account that used the ISP address, you would just change it to the new web based address. Also, another great thing that you can do (and I do this all the time), when someone asks you for an email address and you really don't want to provide one, but it's easier to just provide one - then I use the ISP email address as a not important information place for email to be sent and then have those emails filtered to a folder or to trash.
Anyway, however you decide to use your email is up to you and only you. This is just some information to help you decide, in case you weren't aware that you could have many addresses and you are not tied to just that one address from your ISP. Also, if anyone remembers, back in the 1990's AOL was really big because it was a combination of being your "Dial Up" service provider and software that you downloaded to have full access to the internet and your email and you paid a monthly fee. When we went to broadband/cable service (which is what we all use today to connect to the internet), many people thought that they had to stay with AOL or they would lose their AOL email account, so they still pay AOL along with paying their ISP. This is how an ISP gets you. So, if you look at what goes on today, you contract with an ISP and if you use only their email service and at some point you want to change your ISP, you will lose your email address and have to set up a new with your next ISP or maybe then go with a web based email service, therefore it is a tactic to keep you. Now, look back at AOL and you see how they got us, by just saying yes go ahead get broadband service and just continue to pay us (AOL) to keep your email address. I just don't feel that some things are worth the cost, when they are offered free everywhere else. Again, that is your choice and this is just information.
Enjoy your email and its capabilities.

|
Here is a link to a new favorite place to read about Computers or the Internet called "Ask Bob Rankin".
This is one of his recent articles called "How I Got Hacked...And Why You MUST Have a Backup!" |
Disk Cleanup
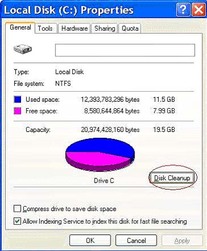
Disk Cleanup is a tool that helps you free up space on your Hard disk (aka hard drive or c: drive). You can use Disk Cleanup to remove temporary internet files, delete downloaded program files, empty the Recycle Bin, remove Windows temporary files, Delete Windows optional components not being used, remove unused restore points.
In Windows XP, Windows Vista and Windows 7, you go to Start or
Start button, All Programs or Programs, Accessories, System Tools
and then click on Disk Cleanup and choose C:.
In Windows 8 you open Disk Cleanup by swiping or pointing in the right edge of your screen and clicking on Search and typing Disk Cleanup in the search box, click settings, then click free up disk space by deleting unnecessary files; in the drives list click on your c: drive, then click OK. Once you get the dialog box, you will need to check the boxes for the file types that you want to delete and then click OK. When Disk Cleanup is finished, it will disappear and it's always a good idea to restart your pc after a cleanup task.
Browsers

Just to help clear up any misconceptions about what a browser
is or does for you, read the following:
A browser is a "search provider" and it allows you to search
and/or browse websites on the world wide web (or "The"
Internet).
The reason I have chosen to explain this subject to you, is due to the fact that I provide many technical services for
people and during the troubleshooting Q and A, I am finding that there are many that are confused as to what or where their browser is located and exactly what it is used for. Many times, it can make all the difference to figuring out a problem.
Just a few facts: You launch your browser, (here are the most common ones used: Internet Explorer (Microsoft), Firefox (Mozilla), Safari (Apple), Chrome (Google)) and then you open a web page, a search engine, or your search provider website (this is what confuses people the most) and now you are "online" (connected to the world wide web) and you are browsing a website or searching with a search engine (ie...Google, Bing, Yahoo, etc...).
So, the browser is the program that you use to access the entire Internet and where you will access search providers in addition to gazillions of other websites.
Not to digress, but another confusing point is email - so, if you use webmail such as Gmail, Yahoo, Hotmail, Aol, Mail, - you can access it with a browser. There are also dedicated email programs like Outlook or Thunderbird, however these are not browsers - they are programs provided by Microsoft or Mozilla - and they are mainly used as an email application, as opposed to going through your browser to connect to it. Therefore the application utilizes your internet connection along with its configuration to allow you to send and receive email (in addition to utilizing calendars, task manager, contacts etc...).
Back to "browsers" Why would we have more than one browser? Well, just the same as we would have more than one computer (older computers cannot do the same or run the same programs as a newer computer - due to the many updates and or upgrades to the technology). In addition, there is the security issue, which allows your browser to be an open doorway to your computer and all of its contents. If a hacker can get you to click on the wrong thing, your personal information is now in their hands and this will lead to many problems. Therefore, we need to keep our Operating System up to date, our Antivirus software up to date along with our browsers up to date. Each one usually will tell you, you just need to become familiar with your software and what needs attention and what may be a fake or rogue application requesting your attention. Check with your providers that they are up to date.
Windows 8
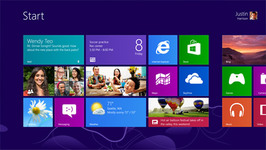
Many people are buying new computers with the latest Microsoft Windows operating system, "Windows 8". It became available on October 26, 2012 and will be supported through January 2018. The Microsoft Product Lifecycle Search states that extended support will end January 2023. Based on this information, it seems that we will have this operating system for quite sometime.
There is now a "Start screen", which displays tiles that connect to people, apps, folders, photos, or websites and they are loaded with the latest most up to date information. Windows 8 comes with a new store for "apps", called the Windows Store. You open the Store right from your Start screen to browse and download apps for cooking, photos, spots, news and lots more - some are free and some you will purchase, if needed. There is still a "Desktop" that you were or are used to with a taskbar, folders and icons and you can switch between the Start screen and the desktop and use the different screens to perform different tasks as needed.
Your files from your previous personal computer can be transferred to the new computer many different ways. Some of the ways to transfer files are: you can use a cloud based program ie...Carbonite, you can use a flash drive or an external hard drive.
HDD = Hard Disk Drive
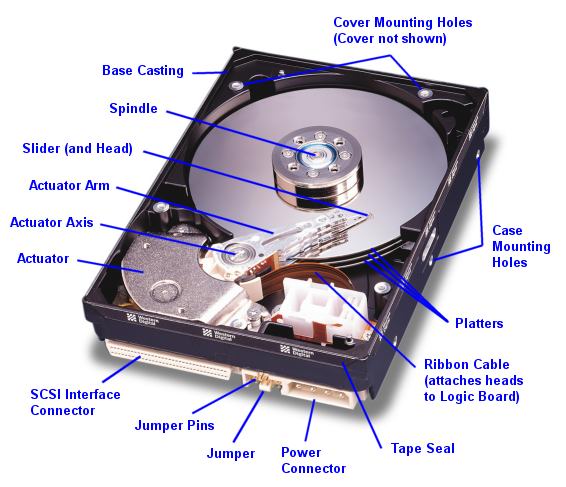
Your personal computer's hard drive is a non-volatile, random access, magnetic data storage device. Very much unlike RAM, which is volatile - because once your pc is shut down or powered off it loses its contents.
The Hard Drive is where all of your information is stored on your computer. It starts with the Operating System (presently Windows 7 is the latest with the new Windows 8 release of October 26, 2012). Next, your programs are stored here and then all of your documents, photos, music, videos etc...
This is one of the most important pieces of hardware inside your computer's case. If you ever decide to discard your computer - remove the hard drive.
These days Hard Drives are 500GB, 750GB and 1TB of Storage Space or more (GB=gigabytes, 1GB= 1024 megabytes and TB=terabyte, 1TB = 1024 gigabytes)
Memory (RAM)
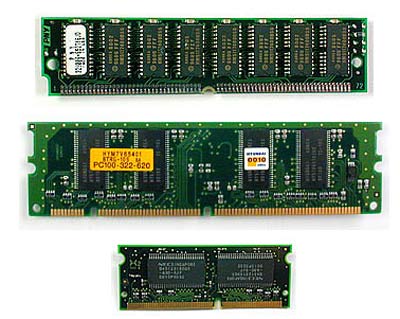
We all use and need Memory (RAM) in our computers. Here is some information about Memory:
RAM = random access memory
This is a type of computer memory that can be accessed randomly and it is the most common type of memory found in computers and other devices such as printers.
Types of RAM:
DRAM (Dynamic Random Access Memory)
SRAM (Static Random Access Memory)
The two types of RAM differ in the technology they use to hold data, with DRAM being the more common type. In terms of speed, SRAM is faster. DRAM needs to be refreshed thousands of times per second while SRAM does not need to be refreshed, which is what makes it faster than DRAM.
DRAM supports access times of about 60 nanoseconds, SRAM can give access times as low as 10 nanoseconds. Despite SRAM being faster, it's not as commonly used as DRAM because it's so much more expensive. Both types of RAM are volatile, meaning that they lose their contents when the power is turned off. (VERY IMPORTANT TO REMEMBER). I had a client call and ask if he should remove the RAM sticks from the inside of the computer if he was getting rid of the computer. The RAM sticks can be used in another computer, but there is no information stored on them. The only thing to remove, when disposing a computer, would be the Hard Drive - this is where everything is stored (ie...Documents, Music, Photos, Programs, personal information, etc...)
In the interim the basic use of RAM (Memory) in your personal computer is for the speed and access of programs.
These days we are using 4GB, 6GB and 8GB of Memory (GB=gigabytes, 1GB=1024 megabytes), in a Windows 7 Personal Computer.
Tablets vs. Laptops
Tablets are becoming more like laptops, but the two devices still have
different areas of focus. They are both big investments, so you need to be
sure you buy the what is best for you. Tablets are still geared toward
watching video, playing games, reading e-books, listening to music, web
browsing and handling light work that can or may be involved with email.
The software and apps are constantly growing, but we are just not quite
there, so if your work involves a pc or a Mac computer - you cannot do everything yet. On the positive side, they are very portable and less cumbersome than a laptop - so when we are away, it is much easier to grab the tablet, your smart phone and you are off.
Need further help or assistance buying or setting up a tablet, contact me.
Backup and Restore
Backup and Restore have greatly improved for Windows 7:
You can create copies of your important files, so you are always prepared for the worst case scenario. You can choose your files, folders, libraries, drives etc... and back it all up to another drive, an external drive or a DVD.
You can set up automatic backups or you can manually back up your files any time.
Click on the Start Button and type "backup" in the search box just above the start button. Then click on Backup and Restore.
Click on "Set up backup" and follow the steps in the wizard. Be sure to have your external hard drive connected or have a stack of DVD-R (or other compatible writable DVD's).
You will then choose your files, folders or libraries etc... and now you will have your files backed up and ready to keep in a safe place, if you ever need to restore these files due to a crashed computer, a hard drive replacement, a new computer or other.
Tech Support Phone Scams
Today, we are dealing with many scams and cybercriminals due to our huge presence and access on the internet. While the internet is a great place and extremely useful to us in so many ways, it is not a place where we can drop our guard. Many think because you are sitting in your safe home, in your own office and on your own computer - protects you, but sadly this is not the case. You must be diligent with your "always connected" devices (computers, xbox 360, netflix, smart phones, kindle, ipads, etc...). Therefore, it is as if you are actually sitting outside in the middle of the world, basically naked - if you do not protect yourself with antivirus software, strong passwords and just some plain old common sense in thinking about who you are giving your personal information to and where you are visiting (is it a safe website?). I went to the place I trust most for my own computer training and where all of my most important software is provided by and that is Microsoft. I found the following article to be a good start. It branches out in many areas, but this article itself is a help for most.
Staying Safe on the Internet while Traveling

While traveling we all want to be connected to the internet for our jobs or for personal business. It is very important that you know and realize that a hotel or any location with a hotspot or wifi access, that gives you internet access on your device, is not secure. If the location and hotspot you are accessing gives you a pass phrase or key phrase (also known as a password) to access their wifi - then if it is set up securely, you would then have a safe connection and secure access to the internet.
If you do use these unsecure hotspots, just be careful where you visit (when I say be careful, do not go anywhere where you would have to sign in or put in credit card information, because if the hotspot is compromised, your information would be vulnerable to a hacker). If you visit a financial site, they usually use SSL (Secure Socket Layer) protection which includes 128-bit encryption, which remains unbreakable. One of the ways you can tell if the site you are visiting is encrypted is that the address will begin with "https" in the address bar (ie...https://thebank.com). You may also see a pad lock somewhere at the bottom of the screen or top - it depends on the browser you are using.
A great way to access the internet securely would be to use a remote access program. This way, you can connect direct to your home or office computer and your will have the advantage of the security measures used on your home or office computer.
Keyboard Shortcuts
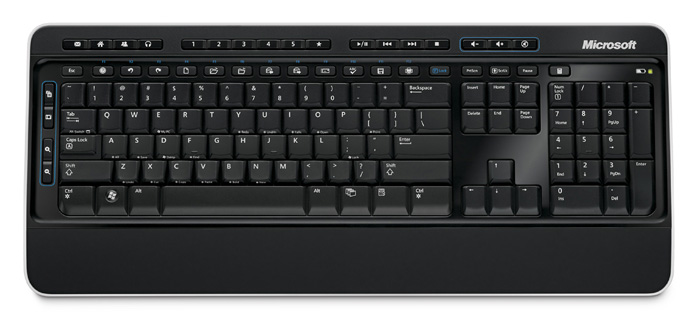
Sometimes we need to just do something quick while typing and instead of lifting your hand (now we're getting real lazy here - lol), to get your mouse to take another step, you can just stay in your typing position and use your keyboard for a combination of keys to produce various moves or tasks.
Below are some frequently used keyboard shortcuts:
Windows system key (keyboard) combinations:
F1: Help
CTRL+ESC: Open Start menu
ALT+TAB: Switch between open programs
ALT+F4: Quit program
Windows Logo key + L: Lock the computer (If you sign on with a password, this will put you at the sign on screen)
Windows program key (keyboard) combinations:
CTRL+C: Copy
CTRL+X: Cut
CTRL+V: Paste
CTRL+Z: Undo
CTRL+B: Bold
CTRL+U: Underline
CTRL+I: Italic
Information obtained from Microsoft Support
Things to do when you purchase a new PC (Personal Computer)
Tasks to perform when you purchase a new personal computer:
-you must first unpack the pc (remove the desktop computer or laptop/notebook out of the box, sort out all of the documentation and software (if provided), jot down the model number, serial number and date purchased on a piece of paper or on the registration card and keep all documentation in one folder or file - labeled for this pc (ie...Dell Inspiron 1525)).
-plug in pc and main peripheral devices (ie...mouse, keyboard, monitor, speakers), not a printer or other device needing to be installed after initial set up).
-power up your pc and wait for Microsoft to go through its set up wizard, where you read and follow the tasks.
-once you are at your desktop (this is where you will see your icons (shortcuts to programs, etc...), and before you really dive into your email and the internet, it is very important that you do the following:
1-create your Recovery CD's (most pc's no longer come with the operating system and drivers and applications CD's - therefore you are allowed (one time, by the manufacturer) to create a set (they range anywhere from 1 - 5 CD's (I have seen more, but, usually - you create them on DVD's and it is 1-3 on most pc's, these days). This is so important that you do this immediately, because once you need to use them and the pc's operating system is already corrupt, you will not be able to create a functioning Recovery CD and you will have to contact the manufacturer to buy a set or sometimes just buy a new Operating System (and an OS starts at around $100.00 plus the installation of it, by the pc technician).
2-be sure you have proper Anti-virus Software (many pc's come with a 60-day trial and you then need to purchase it for it to continue protecting you). You can download a free version from Microsoft at http://windows.microsoft.com/en-US/windows/products/security-essentials which I have used on many of my pc's and clients' pc's and I am very happy with it's features. Do not forget that just because you have antivirus software, you are protected and immune to a virus, because you are not. You must tend to the program (ie...be sure it is always up to date, has run a "full" or "complete" scan recently (I prefer daily) and that it is not reporting any viruses and needing your assistance. While they are usually set up to do things automatically, with the different ways we do things, some pc's are shut down, some are not, some need to be rebooted, some are in sleep mode, some have been off for a week while you were on vacation and they need to be brought back to date and maintained).
3-get your Microsoft Updates.
4-Register your new pc.
5-buy an external hard drive to backup your documents, photos, videos, music, etc...
6-install printer, scanner, webcam, external hard drive etc... (and register all products).
I can really go on for hours about this and spend much time, but for now, I think this is enough work for you. Enjoy and happy computing!
For very detailed "details" and further reading, I found this article (from my favorite manufacturer - "Microsoft")
Maintaining your printer
It is very easy to forget about your peripheral devices. (a peripheral is any device
connected to your pc, that provides a service ie...printer, mouse, webcam, flash
drive etc...) All devices need to be maintained.
One very important one to us, is our printer. Here are some maintenance tips:
Keep it clean:
-dust free
-blow out with canned air
-check your print cartridges (your printer software has a service or tools area where you can go in and click on different printer head cleaning and alignment options)
-be sure not to touch the contacts on the print cartridges
-you can use a moistened (with just a little water) Qtip to clean areas inside the printer.
Turn off your printer, even if you do not shutdown your pc. You may even cover your printer if you want, when it is off.
Use your printer. Some of us do not use it that often. This alone can render it unfunctional. The print cartridges tend to dry up, therefore, you should try to print something each day or a couple times a week.
At some point, they may just stop funcioning properly and you may need to uninstall it and it's software and reinstall it. And sometimes, it just may not work properly anymore. Everything needs to be maintained in some shape or form.
Click here to vote on your
favorite home office printer!
Be a savvy emailer: try not to fall into or get caught up in the "forwarded" emails that surface in our inboxes. Just because something made it to your inbox and it looks like it is from a good friend does not make it legitimate.
If you feel the topic is of interest, research it and get the facts and spread the news to your friends. One place to check on "urban legends" (this is how these articles or messages are referred to) is to go to www.snopes.com. Also you can google the subject and reaearch it there.
Be careful what you click on, always take a look at where the information is being discussed (i.e. the website), does it sound legitimate? We have everything at our fingertips, but we must practice caution and be smart.
Working with files and folders
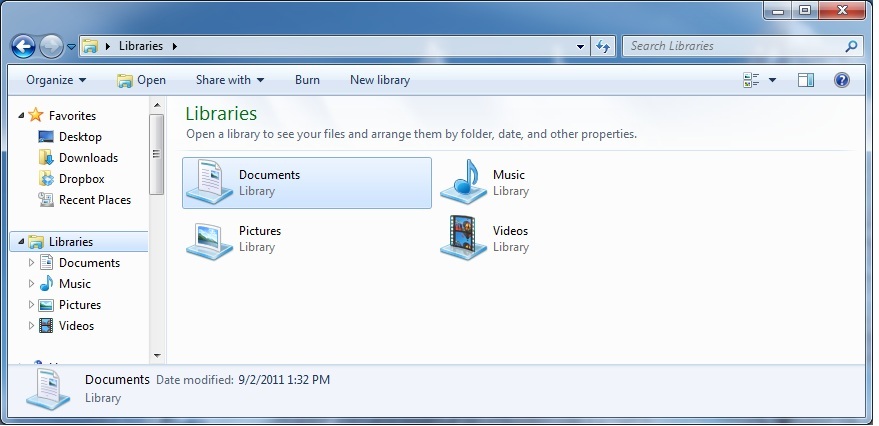
Often while working with my clients I find myself repeating this phrase "Working with files and folders" and continuing to say, "is somewhat confusing". But, if you try to see how Microsoft has tried to arrange things for you, you will eventually (with some practice), see the whole picture and become more familiar with where your documents, pictures, music and other files and folders are located and how to access them with ease.
I am copying and sharing a link with you, direct from Microsoft. Of course, if you have questions and wish to speak to a live person, feel free to contact me anytime and if I do not answer immediately, I will get back to you in a timely manner.
Thank you, Lisa Gambino, A2Z Computer Help. The information above (and in a downloadable .pdf file) was obtained direct from Microsoft.
Laptop Power Cords
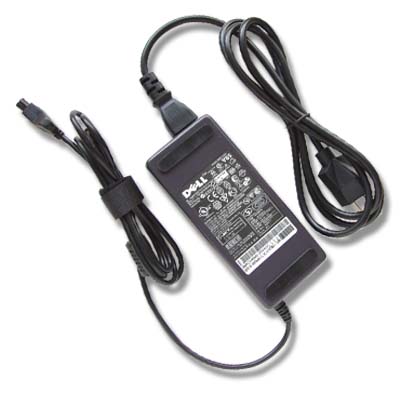
It is very important that you use the manufacturer's authentic and supplied power cord for your laptop. These power cords work in conjunction with your battery. The power cord for your laptop contains the AC adapter power unit that is necessary for charging your battery and you cannot use just any power cord and get the same results.
The power flow is dictated by the power cord and the AC adapter power unit (or the big "power brick"). Not using the correct power cord can damage the battery and it's ability to hold a charge. Also, you may experience power surges with your computer circuitry along with data corruption too. If you find that you lost your power cord or it is damaged or your battery is not holding its charge - it is important that you replace these with the correct models for your computer.
The power flow is dictated by the power cord and the AC adapter power unit (or the big "power brick"). Not using the correct power cord can damage the battery and it's ability to hold a charge. Also, you may experience power surges with your computer circuitry along with data corruption too. If you find that you lost your power cord or it is damaged or your battery is not holding its charge - it is important that you replace these with the correct models for your computer.
Website Domain Names and Web Hosting

I find it is common for people to confuse the domain name registrar with web hosting. In an effort to end your confusion, I have come up with the following facts:
A domain name is like your physical home address or even telephone number and web hosting is the space in your home where you place your things.
When you register a domain name with a domain name registrar, you are the sole owner of this address and no one else in the market will have access to this name besides you.
A web host is also known as the service that provides the web server (where you store information (ie...files,
photos, etc...) along with its network connection, configuration and where it is maintained. Without a good, reliable web host, you will find that your website may be down and will not always function properly. You want a web host that provides very little server down time and fast and friendly customer support.
Costs vary very widely between the domain registrars and the web hosting services. The cost is also totally separate from the cost to have someone design and maintain your website. Be sure to do some research first and/or call and speak with the company first. (It is usually a very good sign when there is a phone number and you can get in touch with a live person.) Be sure to ask many questions and of course if you need additional help or assistance do not hesitate to contact me.
Email Services

This month I would like to talk about email addresses and the companies that offer free email services. To clarify, we all must pay an internet service provider. Our internet service provider (also known as "ISP") is the company that we pay that allows us to have online service in our homes (wired with an ethernet cable or wireless with a router connected the ISP's modem or some provide and all in one modem/router). These ISP's offer us many benefits from email addresses to websites to free wifi service outside our homes and in other states, etc... You may remember a while back, before we had broadband cable or DSL internet service, we were using dial-up service. Many people paid AOL for their service. You do not have to pay anyone for an email service, unless you want the added benefits that they may offer. You only need to pay for your ISP. Additionally, it is a good idea to have an email account with a service that you can always keep. For example, if you have yahoo.com or gmail.com, you will never need to change that address due to changing your ISP. Some ISP's will take back their email account from you, if you leave or change services. Email is important to most people for many different reasons and no one likes to change. My advice is to get an email address from a free email service.
Windows Live "SkyDrive"
Lisa G just created (from some sample photos) a quick photo slideshow in Powerpoint...
just click on the presentation to advance to next photo or click on the icon in lower right hand corner to view the presentation full size
Online Safety

Online Safety is a number one priority for most people today:
The way we browse the internet is by launching a browser. Here are some of the most popular browsers used today: Microsoft Internet Explorer (7, 8 and 9), Apple Safari, Mozilla Firefox and Google Chrome.
It is a good idea to clear your browser's cache and your browser's cookies - as routine maintenance on your pc. Clearing your cache, occasionally, can help make some websites run smoother and free up space on your computer's hard drive - which can sometimes render it running slow.
The cache (also known as browsing history and temporary internet files) stores information, images, and web pages on your computer for quick and easy access. Hackers can obtain crippling financial information from your cache if you are not careful.
Cookies contain information that websites have gathered about you and stored on your computer as small text
files. Most of these files are harmless, but some may store where you went, what you did, and any personal information you may have given. Websites may also allow other websites (ie...advertisers) to put cookies, known as third-party cookies, on your computer.
Click here to see how to delete webpage history from Microsoft for Internet Explorer in Windows 7.
There are instructions that can be found at each of the other browsers' websites to delete cache and cookies.
Taking a screenshot in Windows:
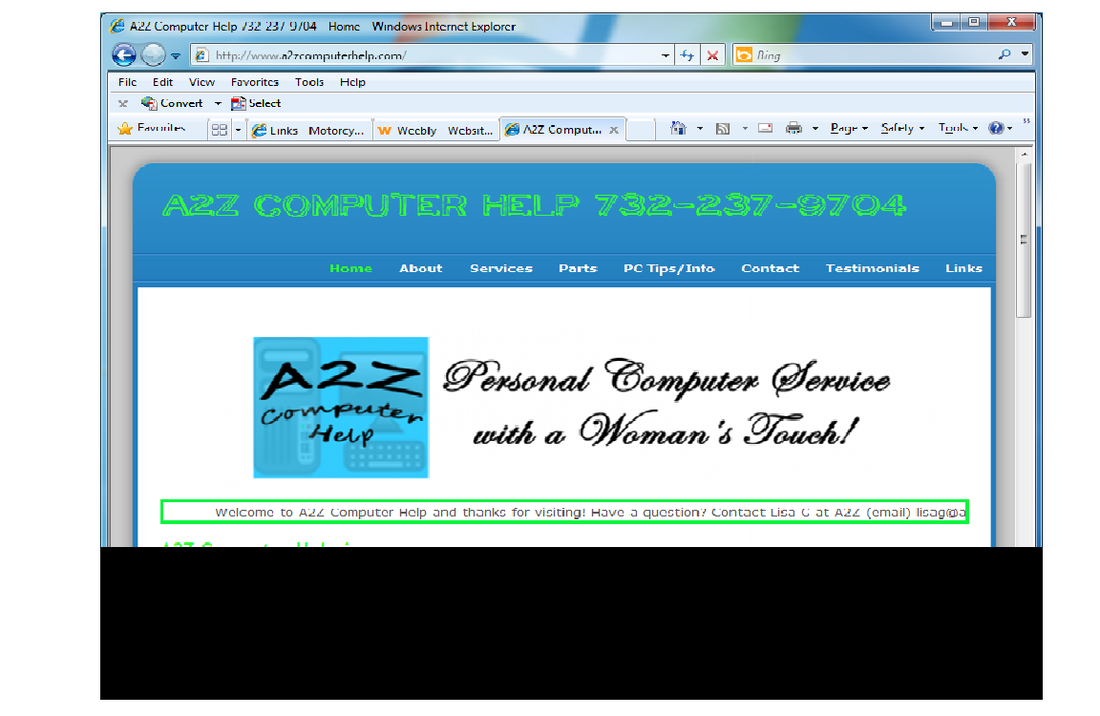
This can help your pc tech troubleshoot or solve a problem you may be having on your personal computer:
On your keyboard, locate the "Print Screen" key (it may be labeled "Prt Sc", "Prnt Scrn" or similar). It is usually found in the upper right hand corner of the top row of keys, to the right of the F12 key.
To take the screenshot of the entire screen, with all windows, press the "Print Screen" key alone. To take a screenshot of the currently selected windo, hold down the "Alt" key and press "Print Screen".
Now open the Microsoft "Paint" program: go to Start, All Programs, Accessories and click on "Paint".
Once in the "Paint" program you just have to "Paste" the contents onto the canvas. There are always more ways than just one (to confuse us) to do things - I think that the easiest way to do this is to just hold your "Ctrl" key with one finger and press the "V" key with another, on your keyboard, and the window that you took a screenshot of will now be visible in the "Paint" program.
You can now save the file and email it your pc tech for help.
How to "help" prevent your email account from being hacked:

Make a password that contains numbers, characters, special symbols etc. Do not use your name or your partner's name as your password and do not choose a security question that can be easily guessed by anyone. Do not use your pet's name and do not give your password to anyone (unless you are with (physically) your "trusted" computer technician).
Be aware of "phishing" emails: these are emails that are fishing for information from you, i.e., they tell you they are the administrator of your mailing account and they need your password. Basically, you create your password, you enter it into the proper area where you sign into your email account, i.e., user name and password at Google:
https://accounts.google.com
(this is a link to the secure (notice the https://) login page for Google's Gmail)
To continue on "phishing" emails - any email asking you for information, i.e., name, address, tel #, password, security question - is simply not a legitimate request - no one will ask you for this information, you provide it when signing up for an account etc...). Just delete or better yet report it to spam and do not think about it. People are falling for these emails that say they have won something, etc. ... just delete them - you will not win the lottery through your email account (at least not yet).
Additionally, your computer may be infected with "Spyware." Spyware is hidden software that secretly runs on your computer and records all of your keystrokes and takes screen shots. So, whenever you type your password, it would be saved by the spyware and read by the one who installed it. Therefore, you must have good anti-spyware to detect the presence of any spyware and remove it from your system. Be sure that you always work on your own personal system and everyone doesn't have access to it. Working on public computers, i.e., in cyber cafes, ships, hotels, etc. ... (contact me and I will instruct you further). Use your mouse to enter the password - start in reverse and click before, etc...
Finally, it is recommended, by Microsoft, that you keep your personal computer up to date, i.e., all Windows/Microsoft updates are up to date and that your anti-virus and anti-spyware software (usually it is combined, for example Microsoft Security Essentials (http://www.microsoft.com/en-us/security_essentials/default.aspx), are up to date - it is the only way to help stay on top of the latest viruses, spyware and hackers.
Ask me how to record videos for youtube and facebook...
_____________________________________________
MENTION ANY TIP, AND GET 10% OFF OUR NEXT VISIT!
_____________________________________________
All tips are written by Lisa Gambino (based on research) and/or noted and linked to the proper resource.